how to install grub bootloader in windows
Download EasyBCD
Pay a visit to the EasyBCD website, scroll down the page and click the Register button. Note that there are both free and paid-for versions of the software available. For personal use, you can get the free edition.
Enter your name and email address (although you are not obliged to do so) and then click the Download button. The program is only 1.5MB in size, so it will only take a moment to download.
Run through the installation of EasyBCD and then launch the program once the setup process is complete.
Boot Menu Configuration
The first time you launch the program, you’ll need to choose the language you’d like to use as well as confirming that you are using it for non-commercial purposes.
Before doing anything else, it is a good idea to create a backup of your current boot menu which you can do by clicking the BCDEdit Backup/Repair button to the left of the program window followed by the Backup Settings button.
 To create a new boot menu entry for Ubuntu, click the Add New Entry button to the left and then move to theLinux/BSD tab to the right. From the Type drop down menu, select GRUB 2 and then enter the label you’d like to appear in the menu in the Name field.
From the Drive menu select the partition or drive you have installed Ubuntu on and then click Add Entry.
 If you now click the View Settings buttons to the left of the EasyBCD window, you should find that there are entries for Windows and Ubuntu listed.
 By default, EasyBCD is configured so that Windows is the default operating system. When the boot menu appears giving you a choice between Windows and Ubuntu, you have 30 seconds to select an operating system or Windows will load.
You can change which operating system should load automatically and how long a delay should be put in place by heading to the Edit Boot Menu section. Use the tick boxes in the upper half of the dialog to choose the default OS and then look to the Timeout Options section at the bottom to configure the delay.
 When you’re happy with the settings you have chosen, click Save Settings.


Edit Master Boot Record
We’re nearly done, but not quite. If you now restart your computer, you will be presented with the familiar GRUB menu from which you can choose Windows or Ubuntu. If you select Ubuntu, this operating system will load as expected.
However, if you select Windows, a second menu will appear, again asking you to choose between Ubuntu and Windows. This extra step can be eliminated by using EasyBCD to replace the MBR – this is handy if you think you’re going to be using Windows more than Ubuntu.
In the program, click the BCD Deployment button to the left and then select the partition containing your C: drive from the Partition menu. Select the Install the Windows Vista/7 bootloader to the MBR and click Write MBR.
 Restart Windows and you’ll see a Windows boot menu rather than the Linux one. However, you will find that the menu is text-based; but you can easily switch to a more graphical version.
In Windows, press the Windows key and X simultaneously and then click Command Prompt (Admin) from the menu that appears. Type
 bcdboot C:\Windows, press Enter and restart Windows and you should see a far friendlier menu from which to choose your operating system.


bcdboot C:\Windows, press Enter and restart Windows and you should see a far friendlier menu from which to choose your operating system.
1. Wifi connection
sudo apt-get updatesudo apt-get install bcmwl-kernel-sourcesudo apt-get install firmware-b43-installer2. Install Java
Reference :
java -version
6 sudo apt-get
purge openjdk-\*
7 sudo mkdir -p
/usr/local/java
8 cd
Desktop/Softs
9 ll
10 sudo cp -r
jdk-7u79-linux-i586.tar.gz /usr/local/java
11 cd
/usr/local/java
12 sudo tar xvzf
jdk-7u79-linux-i586.tar.gz
13 ls -a
14 sudo gedit
/etc/profile
15 sudo
update-alternatives --install "/usr/bin/java" "java"
"/usr/local/java/jdk1.7.0_79/jre/bin/java" 1
16 sudo
update-alternatives --install "/usr/bin/javac" "javac"
"/usr/local/java/jdk1.7.0_79/bin/javac" 1
17 sudo
update-alternatives --set java
/usr/local/java/jdk1.7.0_79/jre/bin/java
18 sudo
update-alternatives --set java /usr/local/java/jre1.7.0_79/bin/java
19 sudo
update-alternatives --set javaws
/usr/local/java/jdk1.7.0_79/bin/javaws
20 java -version
3.Install Ant
$ wget
http://archive.apache.org/dist/ant/binaries/apache-ant-1.7.1-bin.tar.gz
$ tar -zxf apache-ant-1.7.1-bin.tar.gz
$ sudo mv apache-ant-1.7.1 /usr/local
$ sudo ln -s /usr/local/apache-ant-1.7.1/bin/ant
/usr/bin/ant
sudo gedit /etc/profile
JAVA_HOME=/usr/local/java/jdk1.7.0_79
JRE_HOME=$JAVA_HOME/jre
PATH=$PATH:$JAVA_HOME/bin:$JRE_HOME/bin
PATH=$PATH:$ANT_HOME/bin
export JAVA_HOME
export JRE_HOME
export ANT_HOME=/usr/bin/ant
export ANT_OPTS="-XX:MaxPermSize=900m
-Xmx900m"
export PATH
ant -version
Ref :
https://raycodingdotnet.wordpress.com/2013/02/15/installing-ant-on-ubuntu-or-linux-box/
4.Install Maven
Cmd 1: wget http://apache.arvixe.com/maven/maven-3/3.2.5/binaries/apache-maven-3.2.5-bin.tar.gzCmd 2: tar -zxf apache-maven-3.2.5-bin.tar.gz
Cmd 3: sudo cp -R apache-maven-3.2.5 /usr/local
Cmd 4: sudo ln -s /usr/local/apache-maven-3.2.5/bin/mvn /usr/bin/mvn
Cmd 5: mvn -version
sudo
gedit /etc/profile
PATH=$PATH:$MAVEN_HOME/bin
export
MAVEN_HOME=/usr/local/apache-maven-3.2.5
Ref :
https://key2express.wordpress.com/2014/12/11/installing-maven-3-2-3-in-ubuntu-through-terminal/
5. Install Eclipse
http://archive.eclipse.org/technology/epp/downloads/release/helios/SR1/eclipse-jee-helios-SR1-linux-gtk.tar.gz
6. Snipping Tool – Shutter
By Software Center
7.Chrome
sudo apt-get install
google-chrome-stable
8.Enable Right Click
You need to install GNOME Tweaks tool first. It is available in Ubuntu Software Center.

Alternatively, you can install it using the command below:
sudo apt install gnome-tweaks
Once installed, press Super/Windows key to open the Application menu and search for ‘tweaks’. Click on Tweaks to start the program.

In the GNOME Tweaks, go to Keyboard & Mouse in the left sidebar and under Mouse Click Emulation section, select Area.

That’s it. I didn’t need to log out or restart here. You can immediately test it by clicking on the bottom right area and see that the right click is working fine again. If it doesn’t work immediately, you should restart your system.
10.Toolbar Bottom
To install this tool, open the Software application included with Ubuntu, search for “Unity Tweak Tool,” and install it.

Launch Unity Tweak Tool application and click the “Launcher” icon under Unity.

Click “Bottom” to the right of Position under the Appearance heading. You can also set the option back to “Left” from here. The launcher will immediately switch to whatever side of the screen you choose.

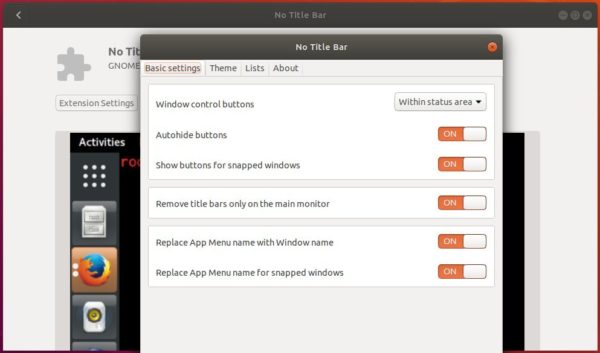
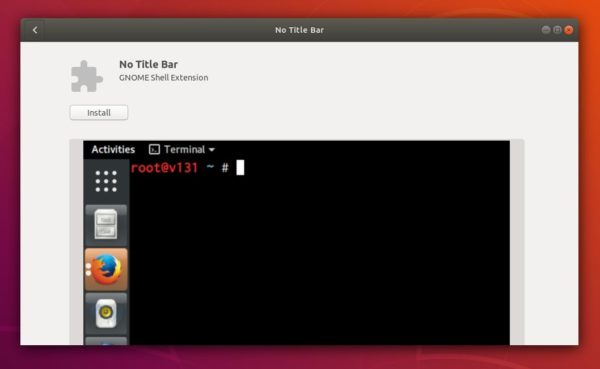
Auto Hide Maximized Window Title Bar in Ubuntu 18.04
1. Open Ubuntu Software, search for and install No Title Bar extension.
2. The extension takes effect once you installed it. To tweak the appearance, click Extension Settings in Ubuntu Software.

The extension does not work for Gnome 3.30 at the moment, Ubuntu 18.10 users can build it from the source code.
move the “Show Applications” icon in Ubuntu Dock?
I found the following workaround using the command line:
gsettings set org.gnome.shell.extensions.dash-to-dock show-apps-at-top true
To make it persistent, run these commands as root:
echo show-apps-at-top=true >> /usr/share/glib-2.0/schemas/10_ubuntu-dock.gschema.override
glib-compile-schemas /usr/share/glib-2.0/schemas/